- Login into the SAP system.
- Enter the Transaction SICF.
- If correct path for the service is know, paste it in the service path and execute else give the service name in the service name tab and execute.
- Right click on the respective service and activate.
- Test the connection finally.

Monday, 12 September 2016
How to activate web services in SICF
Java SLD and SMSY registration
Table of Contents
Introduction
Steps to register the system in central SLD
Pushing the system data from SLD to SMSY
Introduction
This explains how to register Java (Netweaver 730) in central sld. The steps are only applicable for 730 version standalone Java system
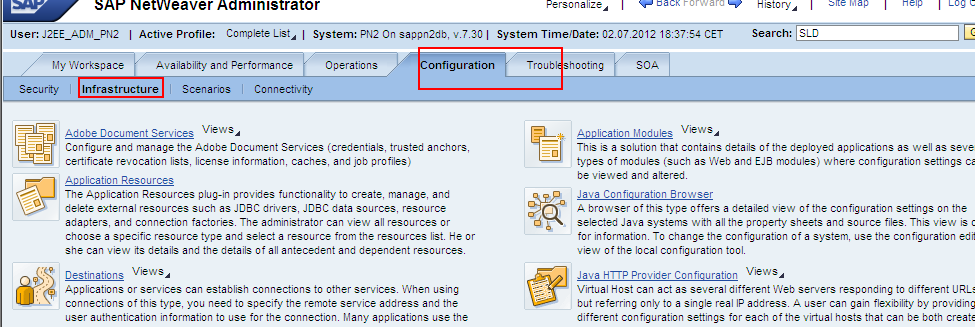
Steps to register the system in central SLD

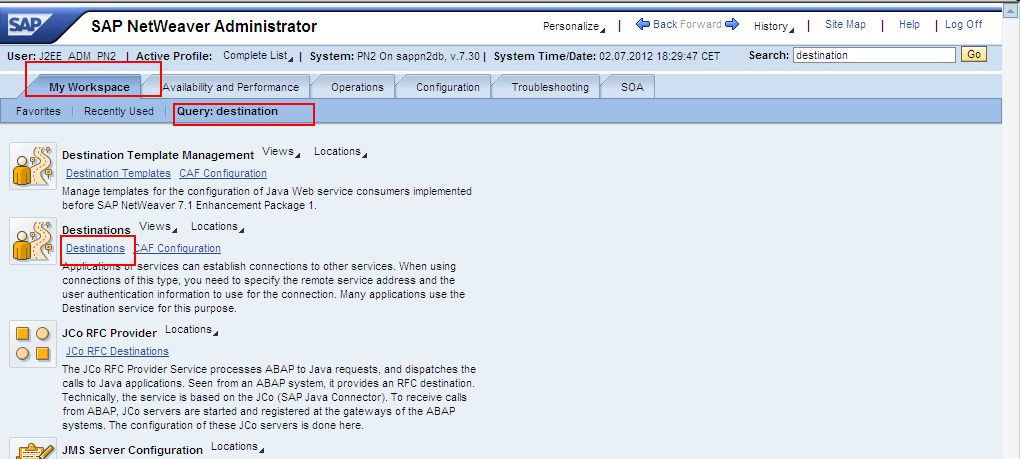
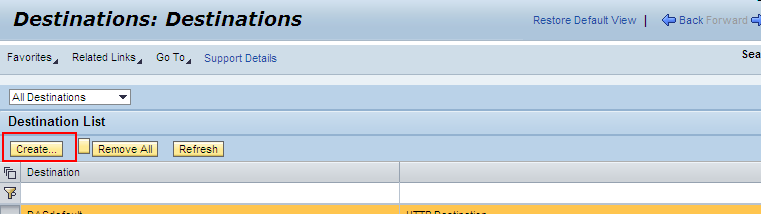
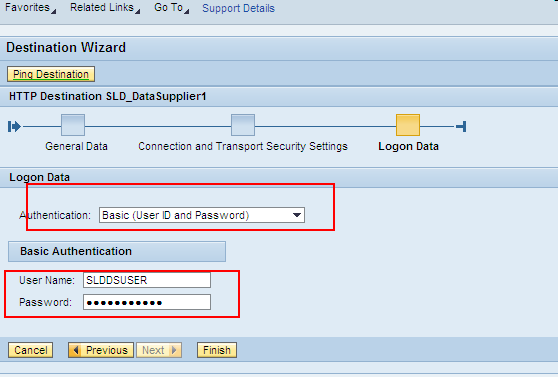
Create SLD destination


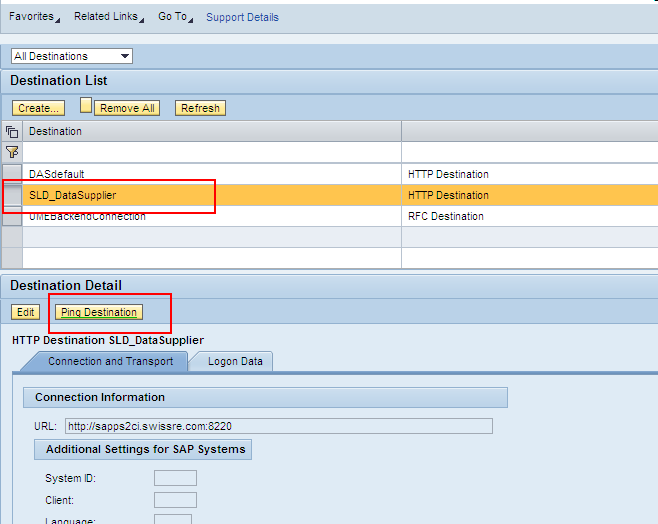
Then test the connection as follows
Once the connection is ready to push the data to SLD please carry out the following steps

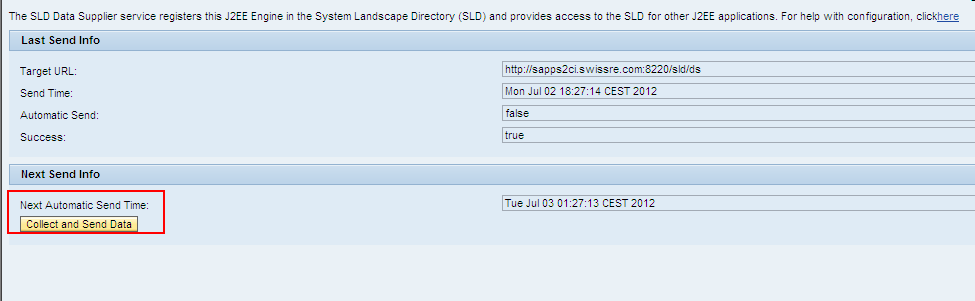
Wait for ten minutes then check in central sld of PS2 for the system
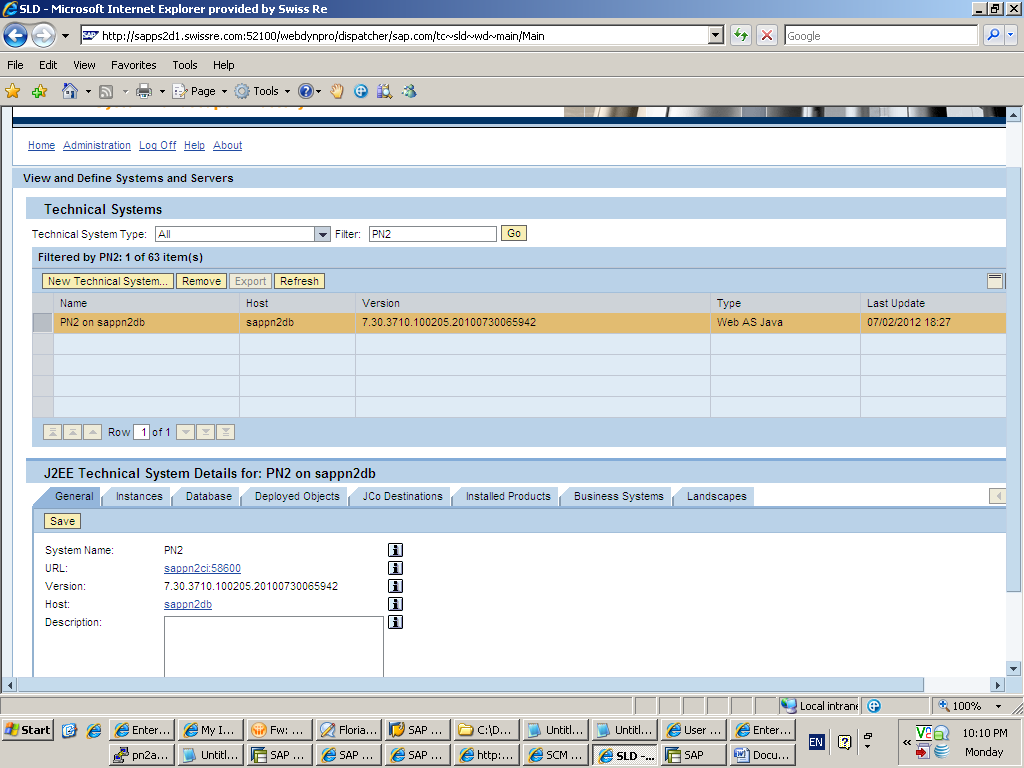
This complete the steps of registering the system in SLD
Pushing the system data from SLD to SMSY
SLD and SMSY is brought into synch by job SAP_LMDB_LDB_0000000001 scheduled in PS2

The job runs every ten minutes
Schedule an additional run for the job and wait for job completion
Once job has completed check in smsy for the system. The system should be available
The system is now available in Solution manager
This completes the setup of Java system in SLD and SMSY
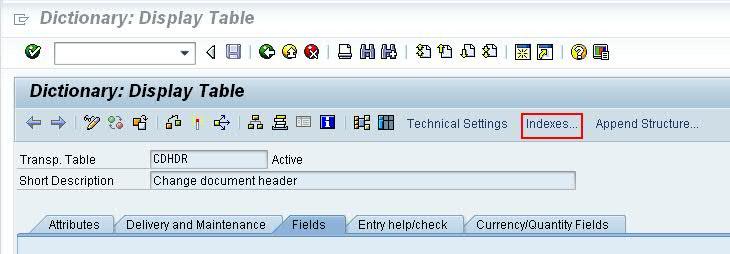
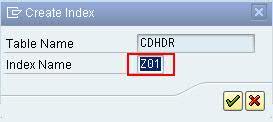
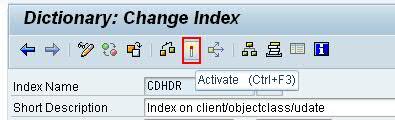
Index creation in SAP
- Go to the
Transaction code SE11

|
 |
|

|
|
|


|

|
 |
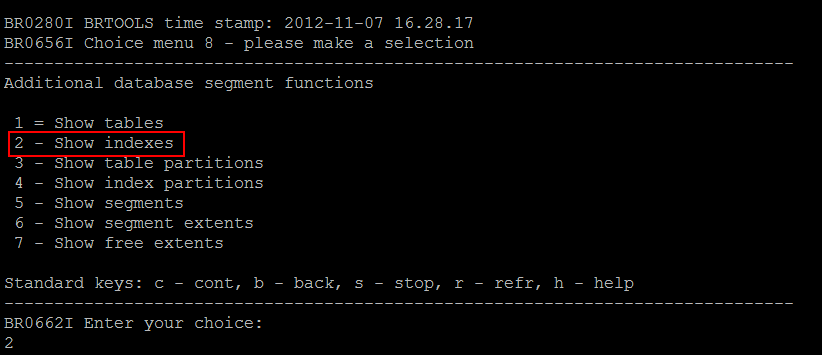
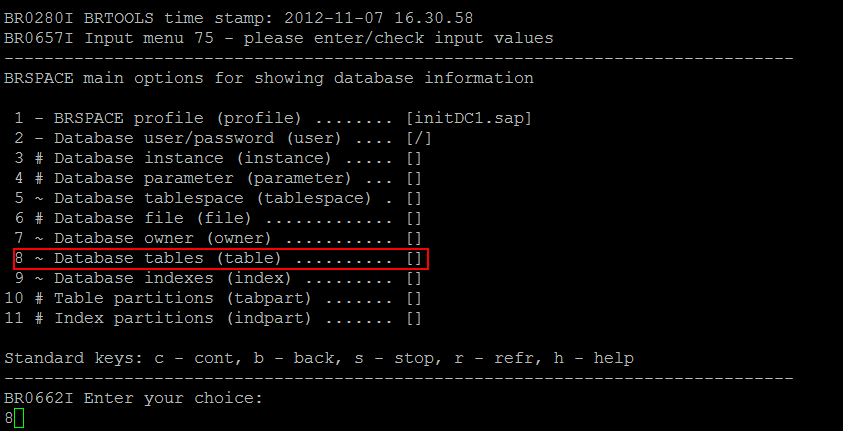
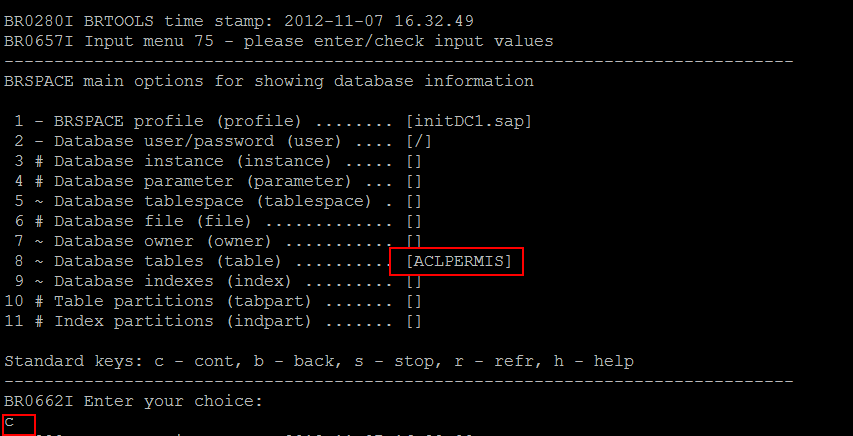
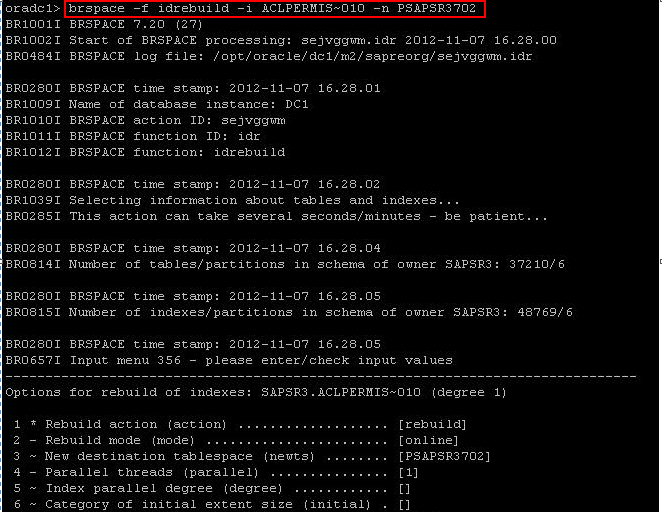
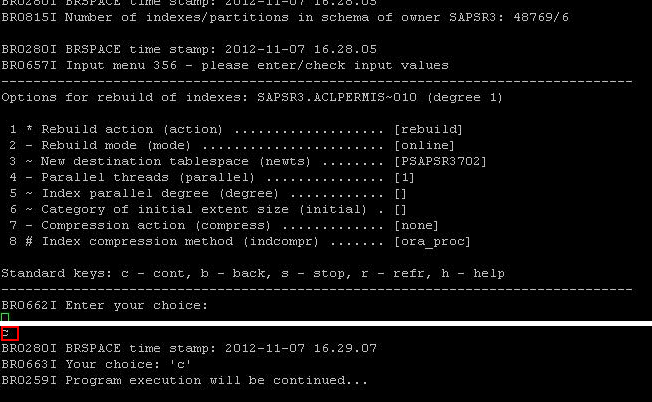
Index rebuild of Table in different tablespaces
(A)
Index and
(B) Tablespace
name
for the required
table from brtools

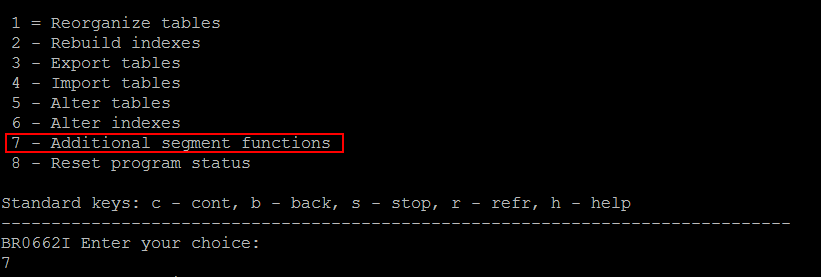


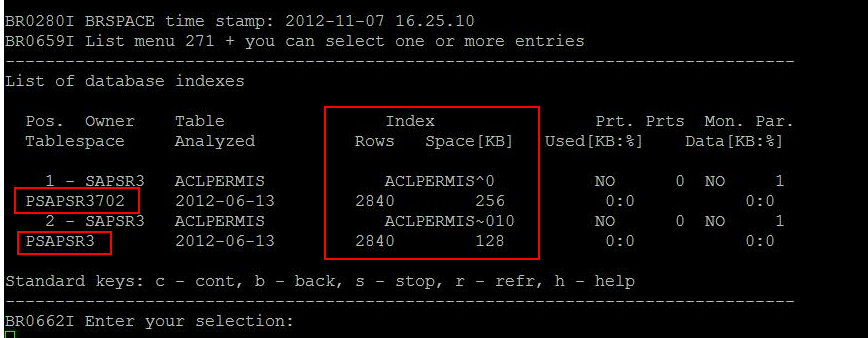
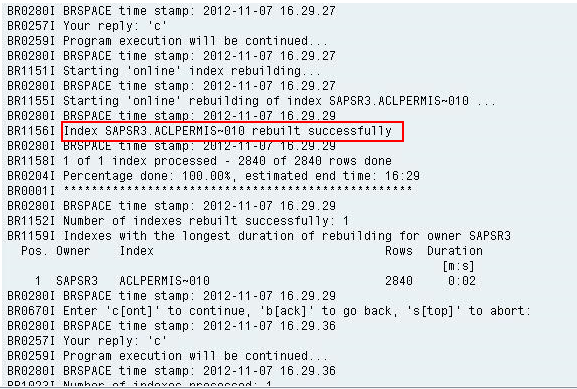
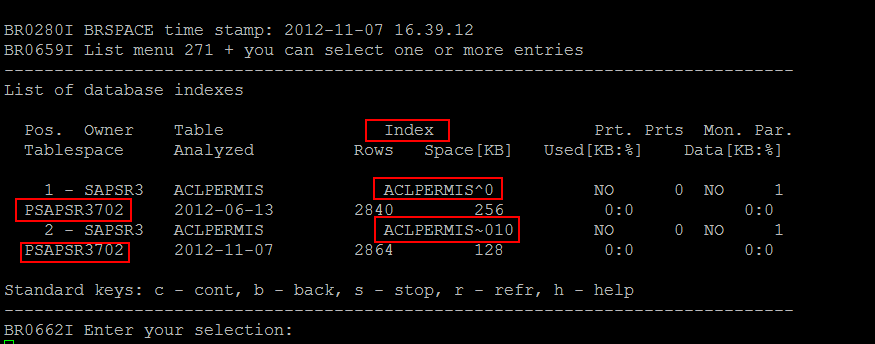
· Now check again in brtools after rebuilt of index
· Once the index rebuilt is done, run update optimizer statistics from db13

SINGLE SIGNON (SSO) CONFIGURATION
STEPS IN SAP SYSTEM
1. Call T-Code RZ10
2. Select "Instance Profile"
3. Choose "Extended maintenance"
4. Click on "Change" button.
5.
Click
on "Parameter" tab
6.
Set
profile parameters
- Login/accept_sso2_ticket=1
- Login/create_ss02_ticket=0
- Icm/host_name_full=<FQHN>(companyname.domain.com)
NOTE: FQHN means - Fully Qualified Host Name
STEPS IN PORTAL SYSTEM (Issuing Ticket)
1. Logon to Portal as Administrator
2. Click on "System Administration"
3. Click on "System Configuration"
4. Then "Keystore Administration"
5. Select "Content" tab
6. In drop down select "SAPLogonTicketKeypair –
cert"
7. Click on "Download verify.der file"
STEPS IN SAP SYSTEM (Accepting
Ticket)
1. Login to ECC system
2. T-Code STRUSTSSO2
3. On Column "Certificate"
4. Click on "Import certificate"
5. Select "File" tab
6. In File path specify location of verify.der file that was
downloaded from portal
7. Select "Binary"
8. Click on "Confirm"
9. On Certificate column you can see details of ticket issuer
system (Portal)
10.
Click on "Add to Certification
List" to add certificate to system PSE
11.
On Certificate Column click on "Add
to ACL"
12.
Enter System ID
13.
Client 000 (as portal don't have client
concept)
14.
Confirm
15.
Save
STEPS IN PORTAL TO CREATE SYSTEM
1. Logon to portal with Administrative rights.
2. Create your folder in System Administration -> System
Configuration -> System Landscape -> Browse tab -> Portal Content
-> "Test SSO" folder
3. Right click on folder "Test SSO" select
"New" -> System (from template)
4. A new tab will open and from their you need to select
"SAP system using dedicated application server" based on your
requirement.
5. Give System Name, System ID and System ID Prefix
6. Click on "Finish"
7. A new system is created under Test SSO folder
8. Right Click on system select "Open -> Object"
9. A new tab will open
10.
In Property Category, select
"Connector"
11.
Input your system details for following
12.
Application Host – host name of Backend
System
13.
Gateway Host
14.
Gateway Service – sapgw<instance no>
15.
Remote Host Type – 3 (connection to R3
system)
16.
SAP Client – client where we added ticket
to access control list
17.
SID
18.
SAP System Number
19.
Server Port – 32<instance no>
(Dispatcher port) as we are using connection type for dedicated application
server
20.
System Type – SAP_R3 /SAP_BW/SAP_CRM
21.
Create System Alias
22.
Specify System Alias name and then click
on "Add" button.
23.
Click on "Save"
TESTING SSO
1. Login to portal as Administrator
2. Click on System Administration -> Support -> Support
Desk -> SAP Application -> Select from drop down "Transaction"
3. Select your "System"
4. Input T-Code in Transaction Code field
5. Select "SAP GUI Type"
6. A window has to open for backend SAP system indicating SSO is
successful.
Subscribe to:
Posts (Atom)