Showing posts with label JAVA and PORTAL. Show all posts

Monday, 12 September 2016

Java SLD and SMSY registration

Table of Contents
Introduction   
Steps to register the system in central SLD   
Pushing the system data  from SLD to SMSY    

Introduction

This explains how to register Java (Netweaver 730) in central sld. The steps are only applicable for 730 version standalone Java system

Steps to register the system in central SLD


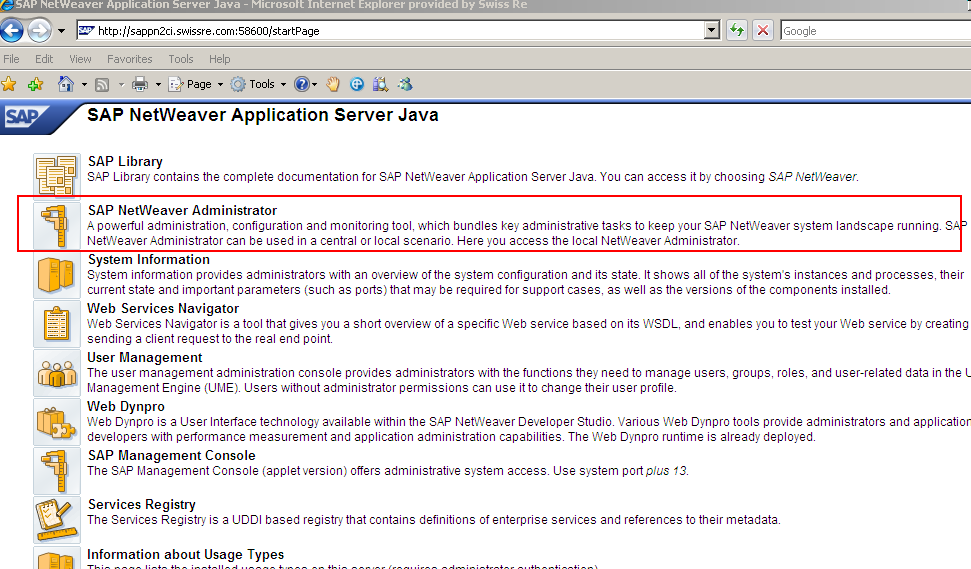
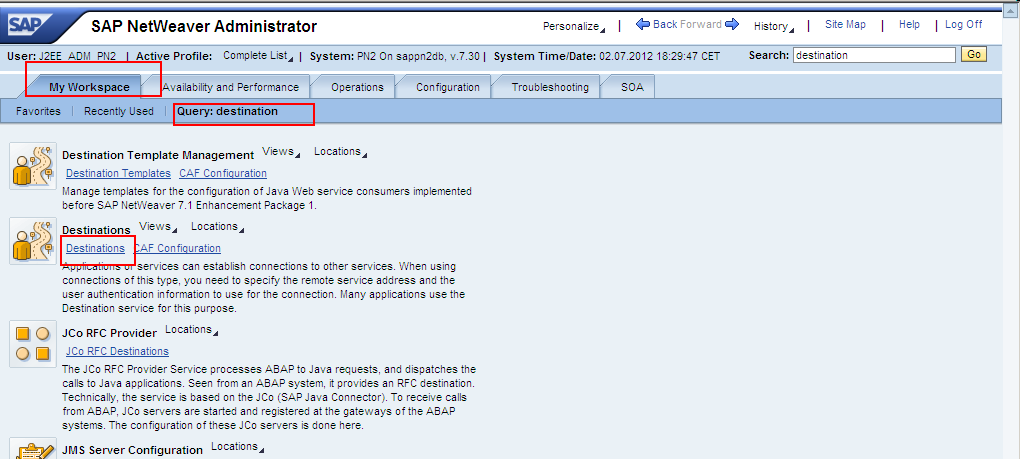
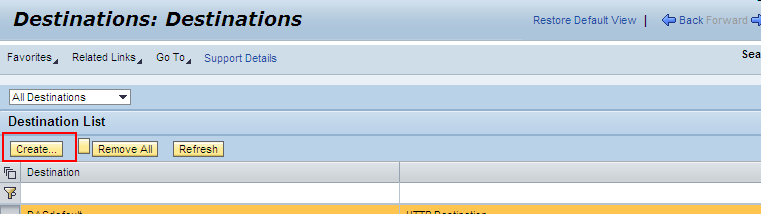
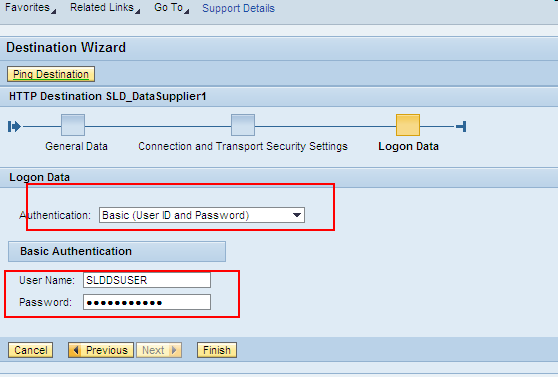
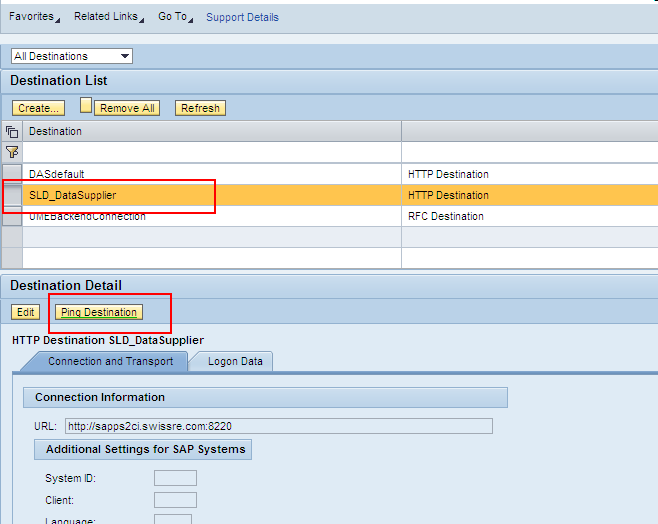
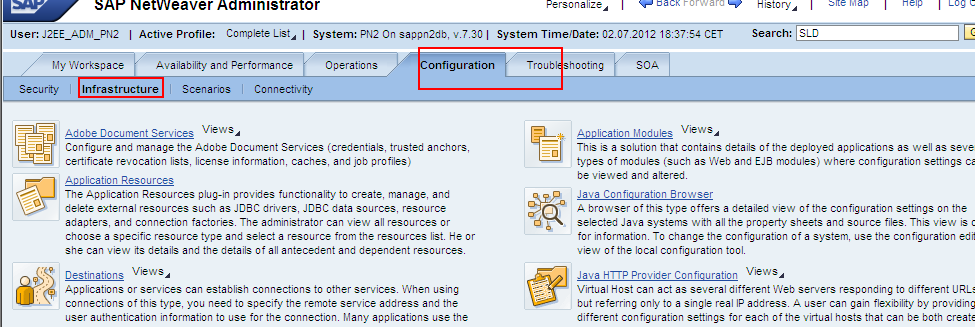
Create SLD destination


Then test the connection as follows

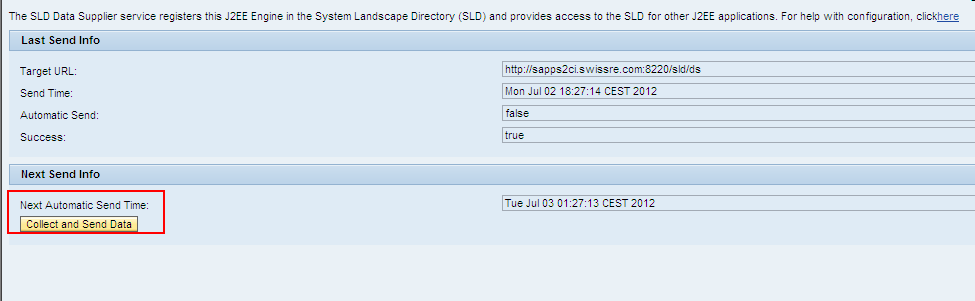
Once the connection is ready to push the data to SLD please carry out the following steps


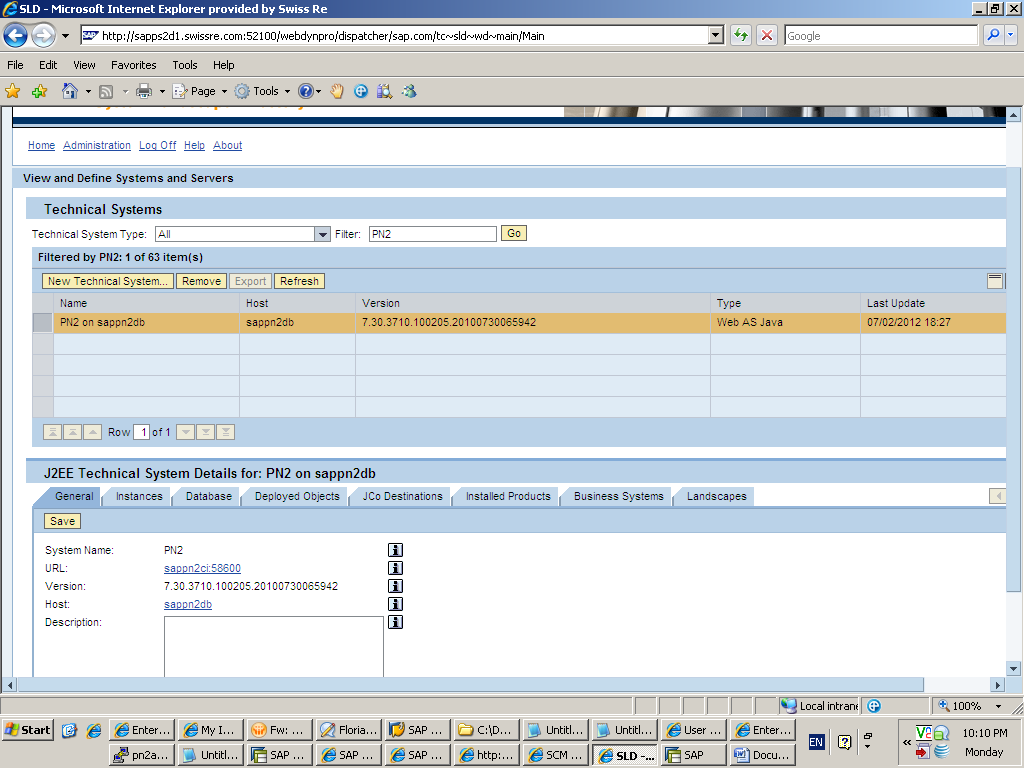
Wait for ten minutes then check in central sld of PS2 for the system


This complete the steps of registering the system in SLD

Pushing the system data  from SLD to SMSY


SLD and SMSY is brought into synch by job SAP_LMDB_LDB_0000000001 scheduled in PS2
The job runs every ten minutes
Schedule an additional run for the job and wait for job completion
Once job has completed check in smsy for the system. The system should be available
The system is now available in Solution manager

This completes the setup of Java system in SLD and SMSY

SINGLE SIGNON (SSO) CONFIGURATION


STEPS IN SAP SYSTEM
1.   Call T-Code RZ10
2.   Select "Instance Profile"
3.   Choose "Extended maintenance"
4.   Click on "Change" button.
5.   Click on  "Parameter" tab
6.   Set profile parameters
  • Login/accept_sso2_ticket=1
  • Login/create_ss02_ticket=0
  • Icm/host_name_full=<FQHN>(companyname.domain.com)

NOTE: FQHN means - Fully Qualified Host Name

STEPS IN PORTAL SYSTEM (Issuing Ticket)
1.   Logon to Portal as Administrator
2.   Click on "System Administration"
3.   Click on "System Configuration"
4.   Then "Keystore Administration"
5.   Select "Content" tab
6.   In drop down select "SAPLogonTicketKeypair – cert"
7.   Click on "Download verify.der file"
STEPS IN SAP SYSTEM (Accepting Ticket)
1.   Login to ECC system
2.   T-Code STRUSTSSO2
3.   On Column "Certificate"
4.   Click on "Import certificate"
5.   Select "File" tab
6.   In File path specify location of verify.der file that was downloaded from portal
7.   Select "Binary"
8.   Click on "Confirm"
9.   On Certificate column you can see details of ticket issuer system (Portal)
10.        Click on "Add to Certification List" to add certificate to system PSE
11.        On Certificate Column click on "Add to ACL"
12.        Enter System ID
13.        Client 000 (as portal don't have client concept)
14.        Confirm
15.        Save


STEPS IN PORTAL TO CREATE SYSTEM
1.   Logon to portal with Administrative rights.
2.   Create your folder in System Administration -> System Configuration -> System Landscape -> Browse tab -> Portal Content -> "Test SSO" folder
3.   Right click on folder "Test SSO" select "New" -> System (from template)
4.   A new tab will open and from their you need to select "SAP system using dedicated application server" based on your requirement.
5.   Give System Name, System ID and System ID Prefix
6.   Click on "Finish"
7.   A new system is created under Test SSO folder
8.   Right Click on system select "Open -> Object"
9.   A new tab will open
10.        In Property Category, select "Connector"
11.        Input your system details for following
12.        Application Host – host name of Backend System
13.        Gateway Host
14.        Gateway Service – sapgw<instance no>
15.        Remote Host Type – 3 (connection to R3 system)
16.        SAP Client – client where we added ticket to access control list
17.        SID
18.        SAP System Number
19.        Server Port – 32<instance no> (Dispatcher port) as we are using connection type for dedicated application server
20.        System Type – SAP_R3 /SAP_BW/SAP_CRM
21.        Create System Alias
22.        Specify System Alias name and then click on "Add" button.
23.        Click on "Save"

TESTING SSO
1.   Login to portal as Administrator
2.   Click on System Administration -> Support -> Support Desk -> SAP Application -> Select from drop down "Transaction"
3.   Select your "System"
4.   Input T-Code in Transaction Code field
5.   Select "SAP GUI Type"
6.   A window has to open for backend SAP system indicating SSO is successful.


Sunday, 11 September 2016

What is JCMON tool


The JCmon is a monitoring program, mainly used to
·         Display list of the processes
·         Enable, disable, restart and debugging the specific process
·         Shutdown a specific J2EE instance
1.   To start the JCmon, login with <SID>adm and execute the below command:
·         jcmon pf=/usr/sap/<SID>/sys/profile/<SAPSID><INSTANCE_ID><HOST>
2.   It will display the below 4 choices on the JControl Main Menu
===================================================
JControl Monitor Program - Main Menu
===================================================

0   :  exit
------------------------------------------------------------
10 : Cluster Administration Menu
------------------------------------------------------------
20 : Local Administration Menu
------------------------------------------------------------
30 : Shared Memory Menu (Solid Rock, experimental)
------------------------------------------------------------

command => 20
From Basis Administrative perspective, most important command is 20, which displays the status of the below:

1.   dispatcher
2.   Server0
3.   SDM
Idx
Name              
PID    
State               
Error
Restart
0
dispatcher        
   8028
Running             
   0
yes   
1
server0           
   7508
Running             
   0
yes   
2
SDM               
    15804
Running             
   0
yes   


JCMon Monitoring tool can be used to administrate the processes and JCmon main menu provides the following functions.
0: Exit
Returns back to the main menu

1: Refresh list
Refreshes the process list and the menu

2: Shutdown instance
Invokes the shutdown of the specified J2EE instance

3: Enable process
Enables and starts a process, which is switched off. (Restart == no)

4: Disable Process
Stops a running process and switches off the restart flag

5: Restart Process
Restarts the specified process

6: Enable bootstrapping on restart

7: Disable bootstrapping on restart

8: Enable Debugging
Checks if the specified process is running in debug mode. If not and the process is configured for debugging, JControl will restart the process in debug mode

9: Disable Debugging
If the process is running in debug mode, JControl will restart the process and switch off the debug mode

10: Dump stack trace
The specified process gets an event to invoke the dump of the stack trace of the Java VM. The stack trace is stored in the stderr<n> output file in the work directory

11: Process list
Displays the status and additional information about all the processes

12: Port list
Displays a list with detailed information about the ports used by the J2EE Engine

13: Activate debug session
Activates the debug session for the specified process. To activate a debug session:
·         The process must be running in debug mode.
·         The process must be “Load Balance Restricted”

14: Deactivate debug session
Deactivates the debug session. The process will be restarted or stopped – this depends on the process configuration

15: Increment trace level
This increments the trace level for the developer trace file of the specified process (dev_<component name>)

16: Decrement trace level
This decrements the trace level for the developer trace file of the specified process (dev_<component name>)

17: Enable process restart

18: Disable process restart


          - - - - - - - -- - - -- - - -Continue- - - -- - - -- - - -- - - -

40 : Enable bootstrapping for all processes with specified process type

41 : Enable bootstrapping for all processes excluding specified process type

          - - - - - - - -- - - -- - - -Continue- - - -- - - -- - - -- - - -

98: Synchronize instance properties

99: Extended process list on/off